Oh nom. Ohhh nom. Nom nom nom nom nom nom nommmmmmmmmslkwoeifjsdfkl!!!!
This. was. everything. Do you read me? Everyyyythingggg.
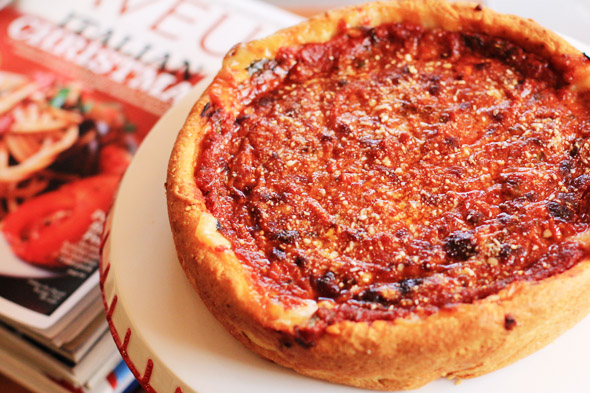
When you take into account that you made this at home without a fancy oven, you might start feeling yourself…(no, not like that lol), but you’ll be very proud. I’m proud of me right now. This pizza is delicious, super easy to make, and the flavor is spot-the-hell-on. The crust is flaky, tender, buttery…you’ve got a creamy gooey layer of cheese…yummy toppings and a delicious sauce on top…aw man. Nom Nomerlo Nomington Jr.!
Sidenote: I’m sitting here watching Black Swan and I’m legit creeped the f*ck out….
Anyway…
I grew up on the east-coast and have always a “thin crust” variation readily available to me. I don’t wanna speak on popular pizza chains, because although I ate them as a kid — growing up and developing somewhat of a responsible palate has made me realize just how truly disgusting they are lol. No offense if you love any of the popular pizza chains, its just that when you learn how to make these things at home and see how they taste so much better — not to mention you know exactly what you’re putting in your mouth, you really put your food on a pedestal above any processed and/or mass-produced crap in a box. I used to love a certain chain’s “pan pizza” as a kid. It was bready, it was greasy, it was laden with globs of lactose-unfriendly plasticky cheese — it was everything a regular kid from Virginia who didn’t know any better could ever want. But now? Oh god, If I hate a slice today, I would probably throw up — no bullshit. It’s just so gross to me.
I won’t get into a NY vs. Chicago pizza debate because it’s just not that deep to me. You can like both, and to keep it real, you can’t even compare the two! They’re not built the same, they don’t have the same ingredients, they don’t bake the same way….they’re just cousins of the same concept. NY style is definitely beneficial for the fast-paced city lifestyle — grab a slice and go. Chicago-style is a bit more “dinner-like”, and requires a knife and fork. It’s seriously a meal, and it’s delicious. Some of you may prefer one over the other and that is totally fine — but me? I’ll take both varieties please!
So that brings us to this deliciously sexy pizza. If you’re a lover of deep-dish pizza, you’ve gotta make this — it’s soooo worth the time and it’s ridiculously easy. You basically make the dough, let it rise, roll it out, laminate it, proof it, roll it out, build it, bake it, and eat it. It makes 2 9″ deep dish pies, but you can keep the second ball of dough in the fridge overnight and make another one the next day. Just make sure you let the dough sit at room temperature a good 10 minutes before you try to roll it, otherwise it’ll snap back and be too difficult to work with, and you absolutely need to get this dough nice and wide because it’ll shrink in the pan while you try to assemble it (trust me on this). This pizza should be cooled a good 15 minutes before you cut into it, or you’ll have it gush out everywhere. I waited about 8 minutes, due to admitted impatience, and saw that my pizza was spilling it’s guts lol. I don’t care though, it was still amazing. Super gooey, uber flavorful homemade perfection.
Is it as good as an actual Chicago Deep-Dish? I wouldn’t know. I’ve never been to Chicago 🙁 But I do know one thing for sure, it’s pretty damn close. I’ve had a few versions of chicago-style pizza in my life (no, not that disgusting excuse for a deep-dish at Uno’s), and this baby here tastes better than all of them — especially since I made it at home.
This recipe is fool proof, easy to follow and incredible to eat. The only “factor” here is time — letting dough rise once or twice is always an eye-rolling yet necessary pain in the ass…but so worth it.
This is a very pic-heavy post. I wanted to take a photo of as many steps as I could so that you guys don’t eff this up haha 😉
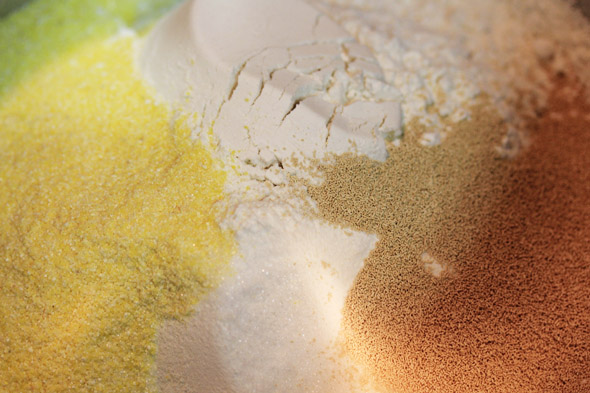
whisk together all of your dry ingredients…
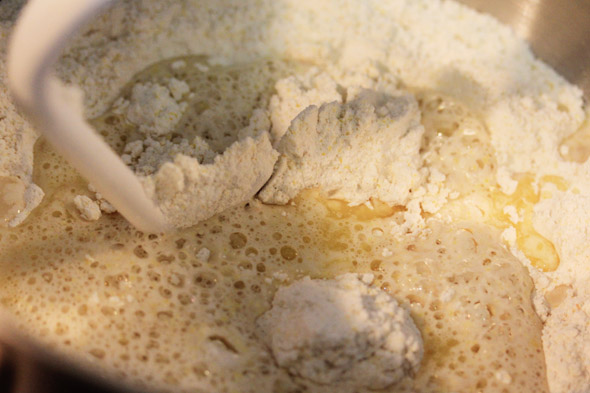
add the water and butter and with a dough hook on low/medium-low speed, bring it together.
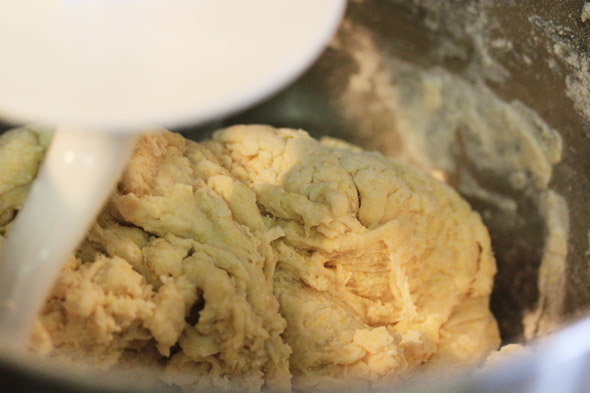
until a shaggy dough forms…like this.
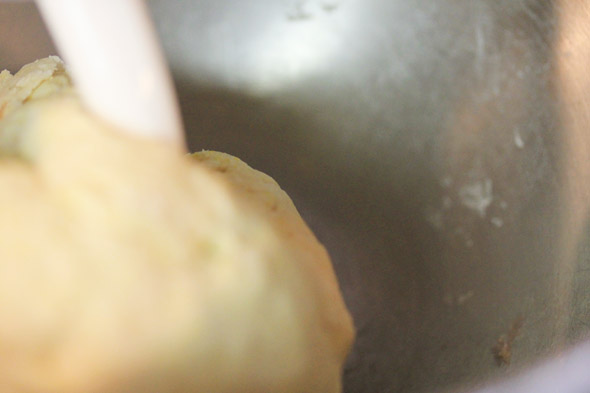
then knead it in the mixer until it is a shiny smooth ball that pulls away from the sides completely. this should only take a few minutes, depending on the humidity of your situation.
grease a large bowl with olive oil.
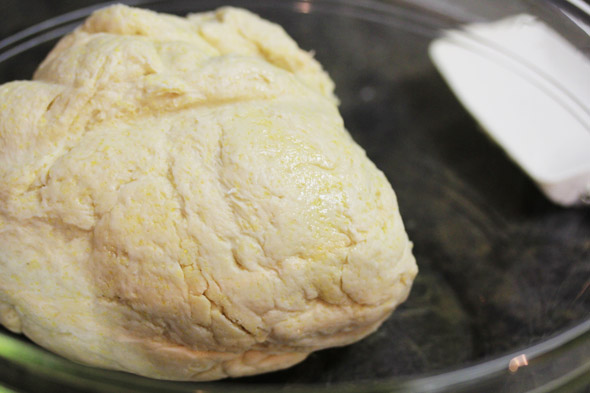
plop your dough into the bowl…
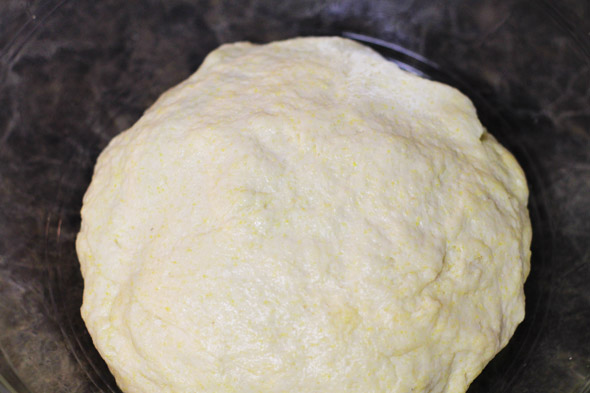
roll it around in the bowl so that some of the oil gets all over the dough, then form into a ball…
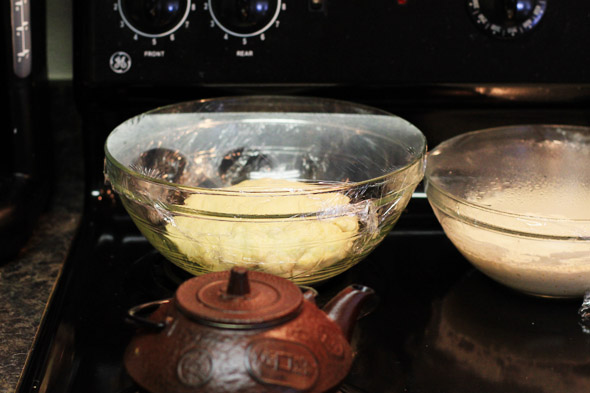
cover tightly with plastic wrap and let it double in size, about a good 45-75 minutes.
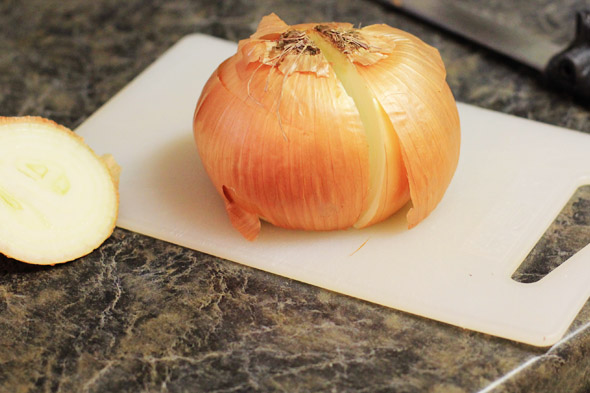
meanwhile, start preparing your pizza sauce…this will take a good half hour to do and its WORTH it! take a small onion, or halve a large one like I did here.
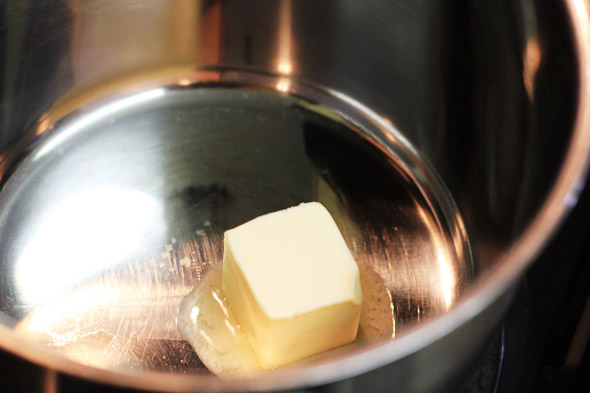
melt some butter in a saucepan over medium heat…
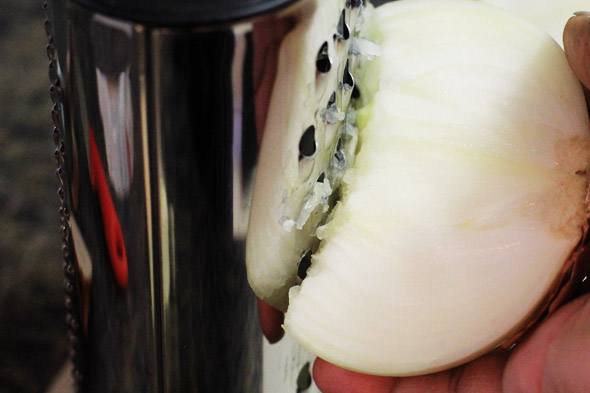
while the butter is getting nice and happy, grate an onion…grating it produces a stronger onion flavor because it opens up the cell walls of the onion. if you don’t have a cheese grater, try to mince the onion as best as you can.
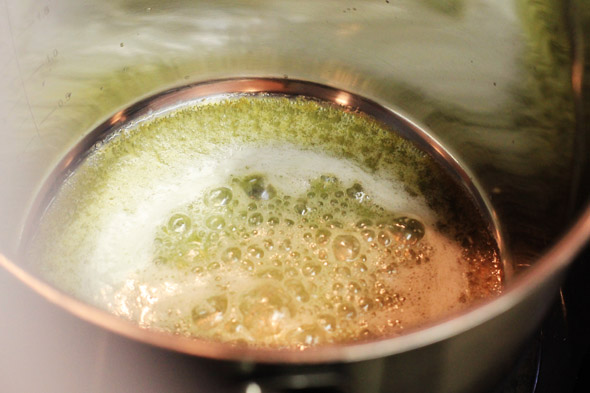
that took no time, the butter is foamy and ready to be fed.
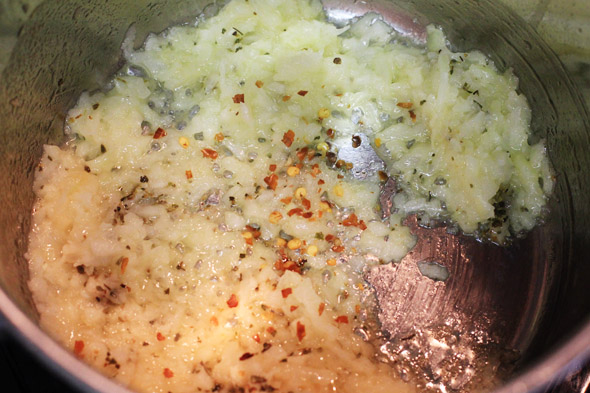
toss in the onion, oregano, and crushed red pepper flakes (amount is up to you).
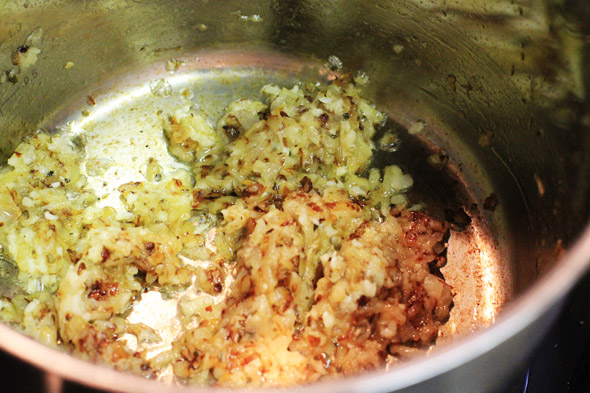
my onions browned a little too quickly because I hopped on the phone and got distracted (don’t do what I did lol). However, I was able to save it before it burned. You do want the onions to develop a bit of color, but at a reasonable rate. After the onions develop a golden-brown hue, add the garlic and cook for about 30 seconds.
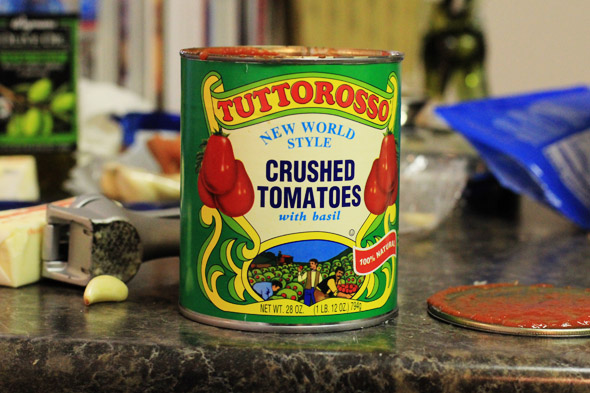
open a can of crushed tomatoes..
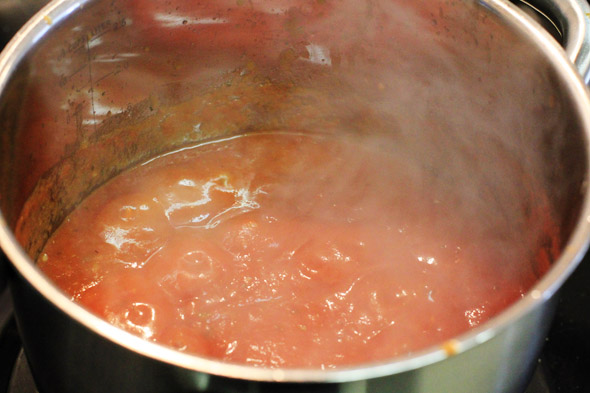
add the tomato sauce and bring to a boil on high heat…then reduce to a simmer (uncovered so the runny juices can evaporate).
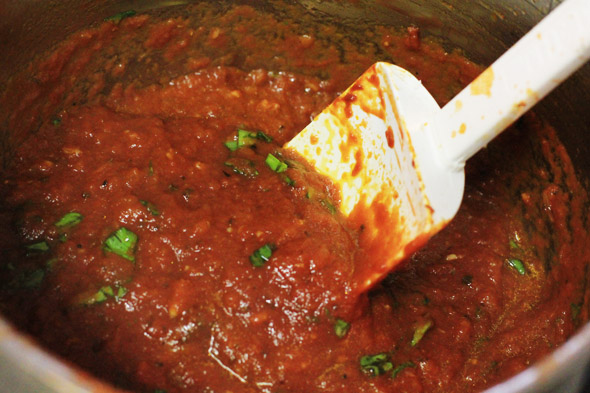
after about a half hour, you should have a thickened sauce like this. Remove it from the heat and add in the basil and olive oil. This is the stage you wanna season the sauce as you see fit. Throw in some salt, pepper, etc.
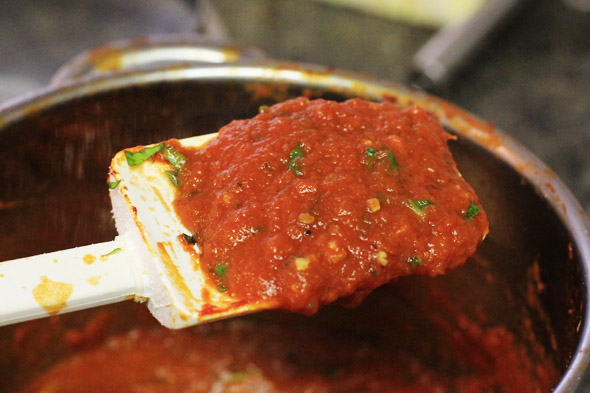
see how nice and thick it is?
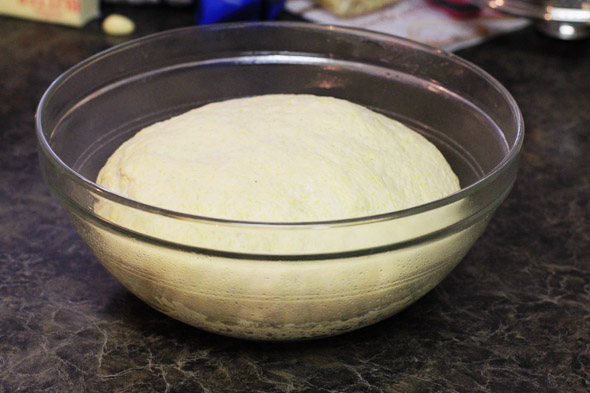
oh look, our dough has risen quite a bit!
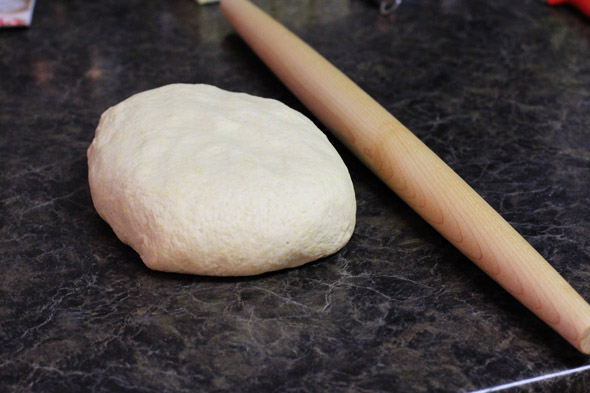
because the dough has a good amount of fat in it, we don’t need to flour our work surface. Adding more flour would make the dough tough.
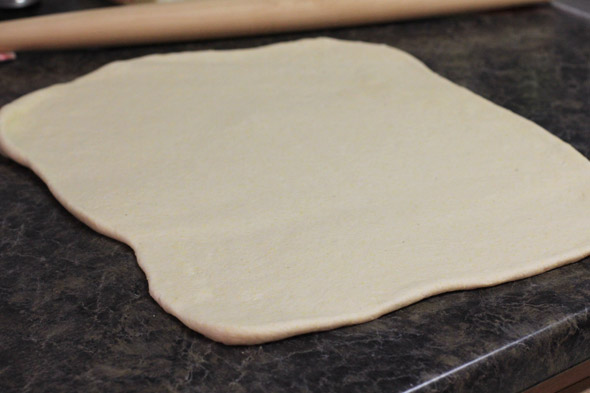
because this is Chicago-style, we want to develop a flaky butter crust…so we have to do a bit of trickery here…unroll the dough into a square, just like you would do for cinnamon rolls…
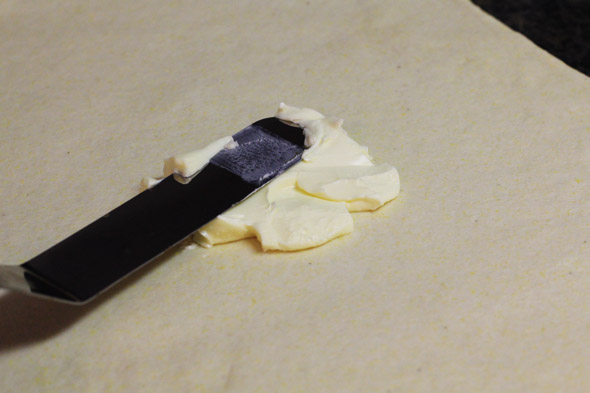
add room-temperature butter and spread all over the surface, leaving a good half inch border. Make sure the butter you use isn’t too warm because it’ll become greasy. It should still be cool but spreadable.
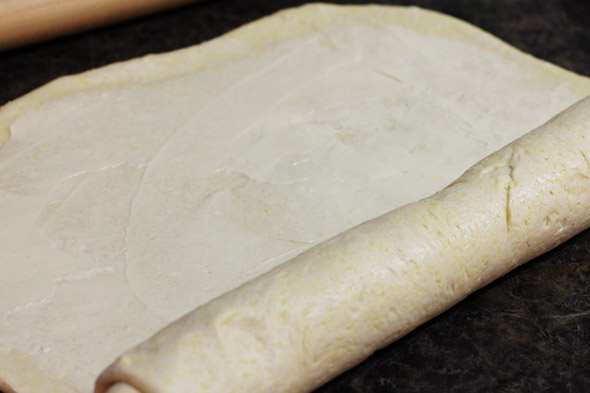
roll it up.
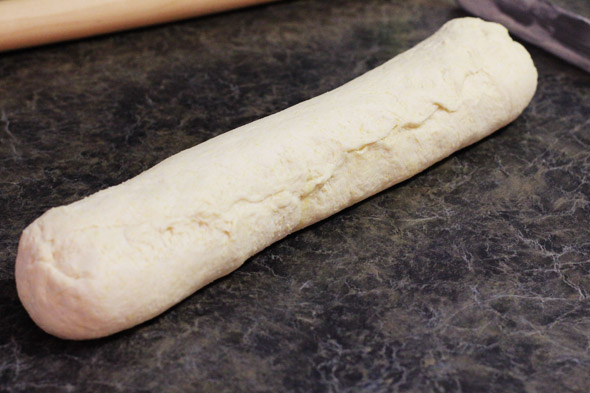
pinch all of the seams together to create a “package”.
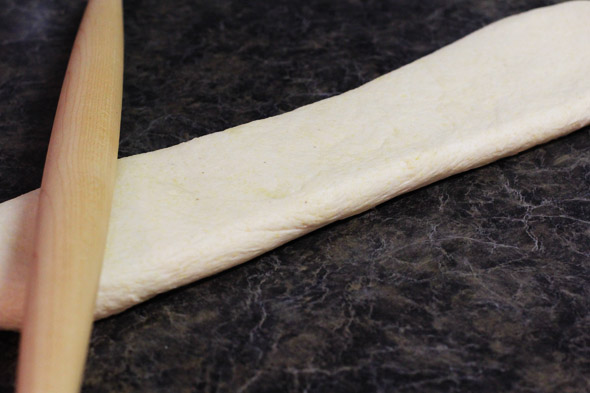
then roll the log out to encase and trap the butter into the dough…do it gently! You should have something that looks like this above..
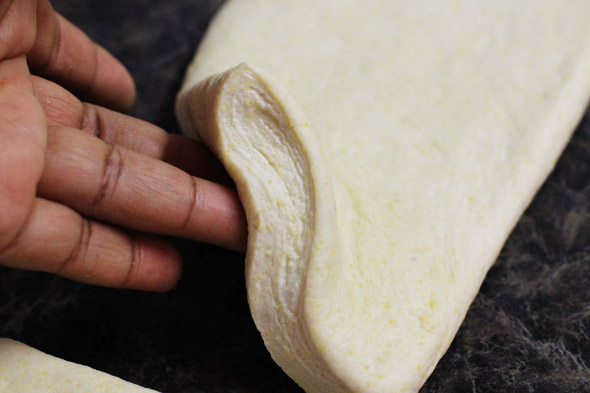
with a sharp knife or bench scraper, slice the somewhat flattened dough log in half. See what happened here? We have layers! When baked, the butter trapped inside of the dough will expand and create delicious flaky layers — so do not skip this step, it’s essential!
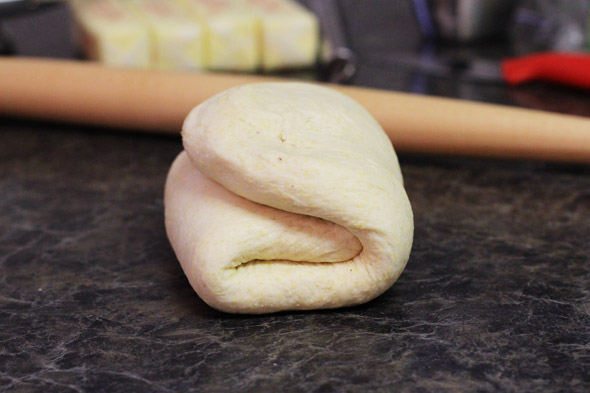
take each half of the rolled out dough and fold into thirds, like this…
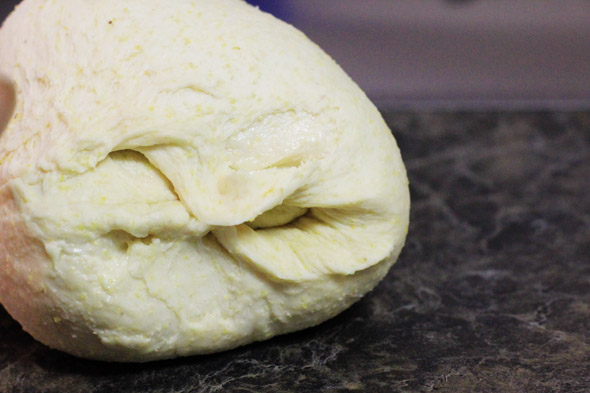
gently pinch together all of the seams so that it forms a tight ball…we’re almost there…
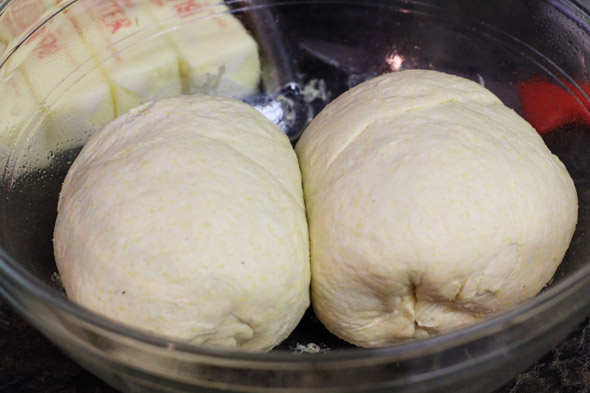
ahh, there we are. Place each dough ball side by side into your bowl, cover with plastic wrap and allow the dough to double in size again..but this time in the refrigerator.
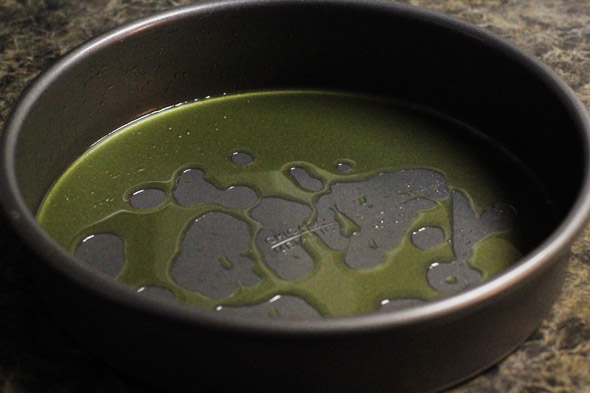
make sure you bake this in a 9″ cake pan with straight sides that are at least 2″ high. Grease it well with olive oil, and coat the sides. The oil will naturally sink to the bottom, and that’s fine.
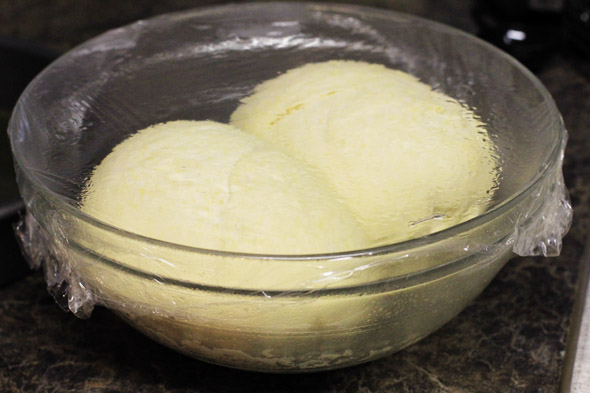
puffy dough from the fridge and hour later. Pull each ball out and let it rest for a good 10 minutes before you roll it. It’s very cold, so rolling it immediately out of the fridge will make it too difficult to work with.
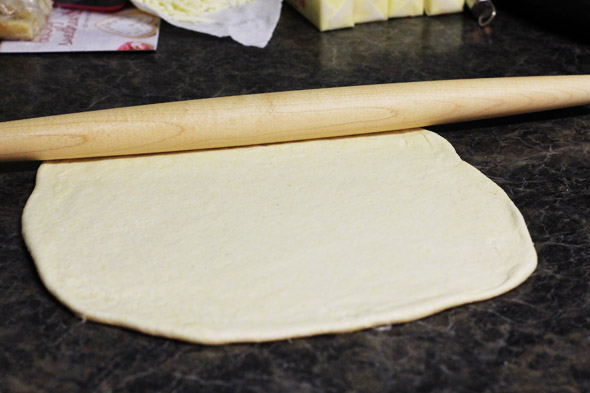
roll it out into a nice 13 inch circle…
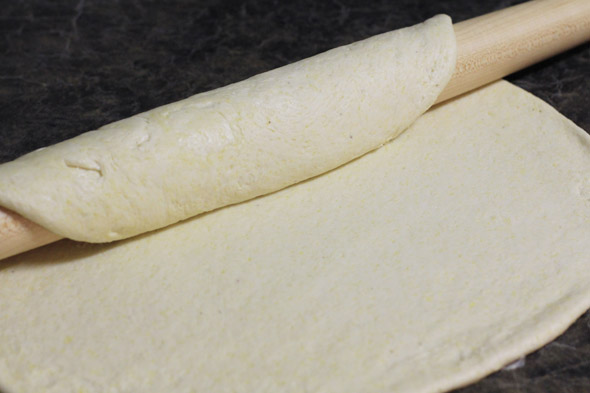
gently roll the dough up on the rolling pin, and transfer to your prepared pan…
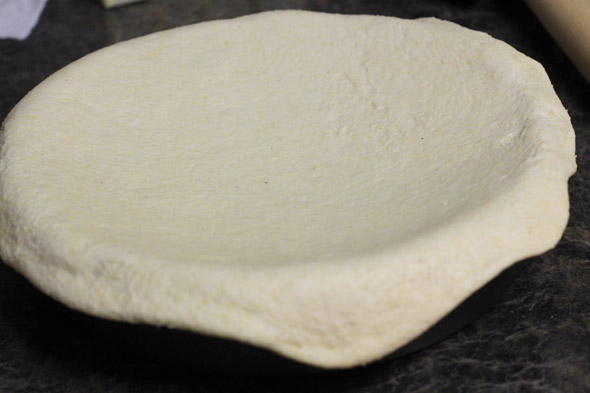 oops, we’re not quite there yet. Although I rolled mine into a 13″ circle, my dough was still too cold so it was starting to snap back. I left it on top of my cake pan to rest and stretch out a bit. Be patient with it.
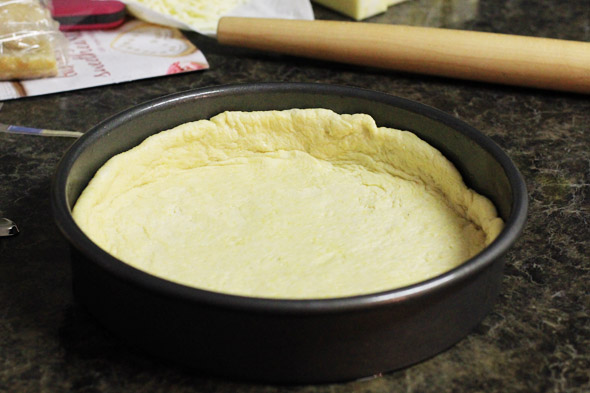
once the dough is workable, but not too warm…nestle it into the pan and create a crust that’s about a half inch from the rim of the pan…as you can see, mine started snapping back — again, it’s important to let the dough relax a bit before working with it lol. I didn’t care at this point because I knew it would stretch out again once I gently pressed the cheese into it. Make sure you press the dough into the corners of the pain so that no large air bubbles form.
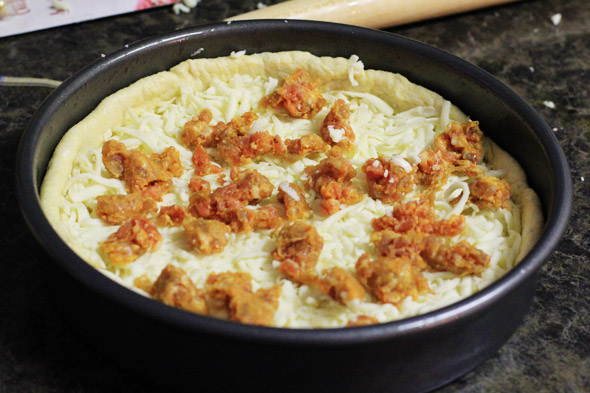
if you’re gonna add sausage to this pizza, make sure it’s raw — it will have plenty of time to bake in the oven, so don’t worry. It will also soak up that delicious pizza sauce and become tender bites of sausage. Mmmmmm…
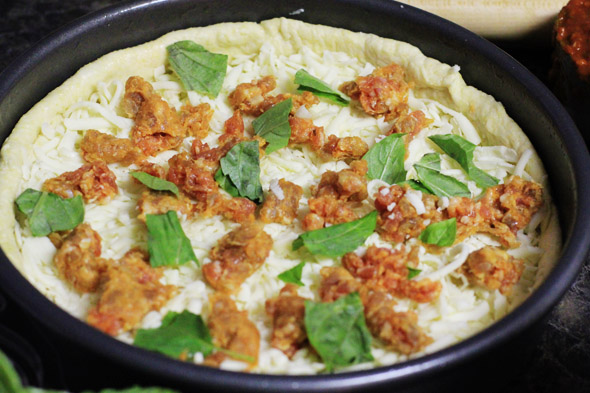
I threw in some basil, just because I had it. Put whatever toppings you want on your pizza…just make sure the cheese is the first one in the pool 😉
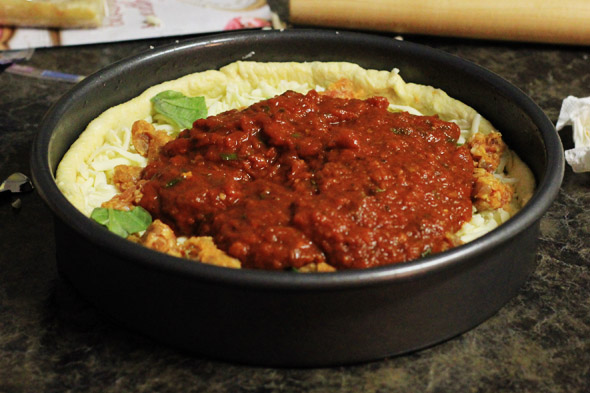
finally, top it off with about a cup of the sauce (or more if you’d like)…
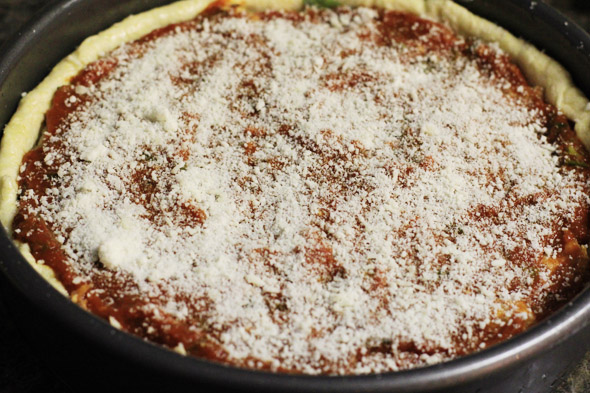
spread the sauce to the edge of the crust,and sprinkle it with some grated or shredded parmigiano-reggiano cheese.
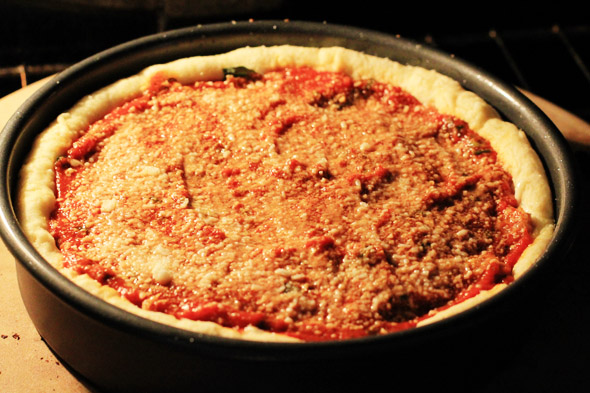
bake it. Mine stayed in the oven for 35 minutes…but your pizza may take only 20 to 30 minutes. Let the pizza cool in the pan for 10 minutes, then gently remove it to rest an additional 10 minutes before slicing into it. Please remember that the cheese is so super hot under that sauce, and if you cut into it too early, it’ll spread everywhere and get messy. So be patient, it will be worth it in the end 😉

she’s beautiful…
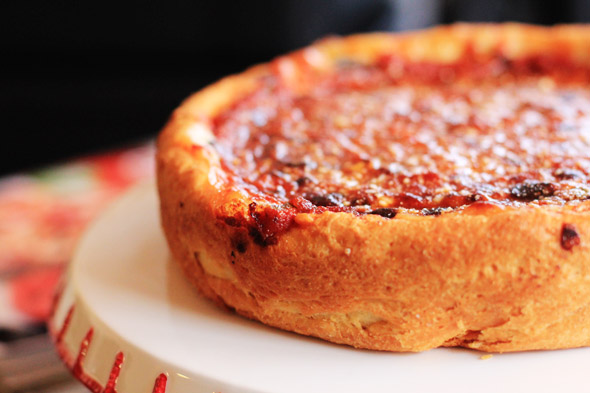
look at that crust!
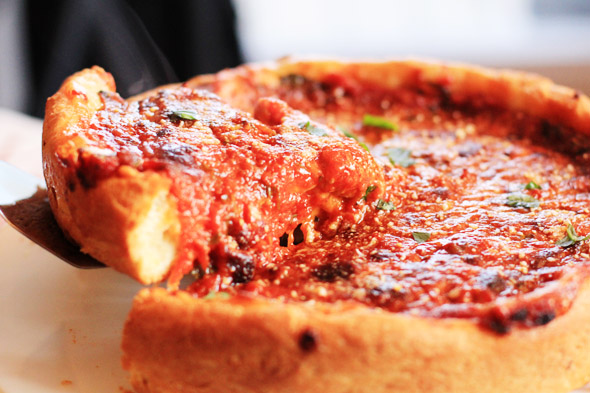
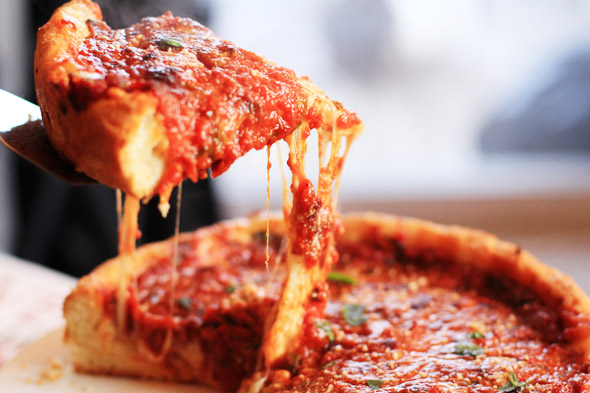
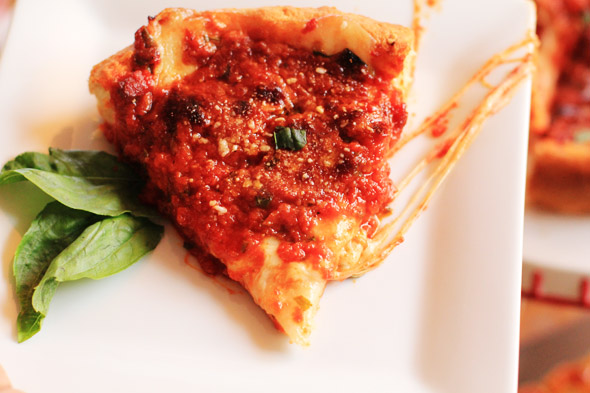
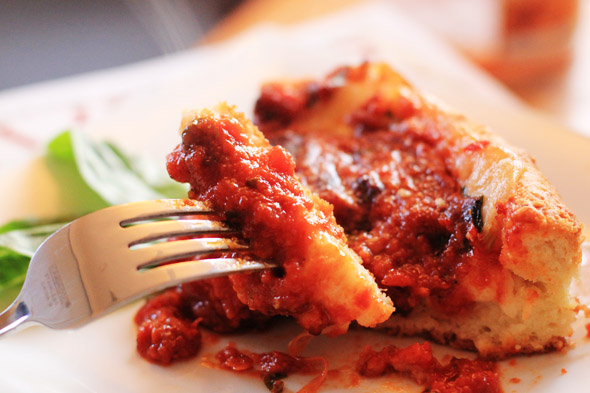
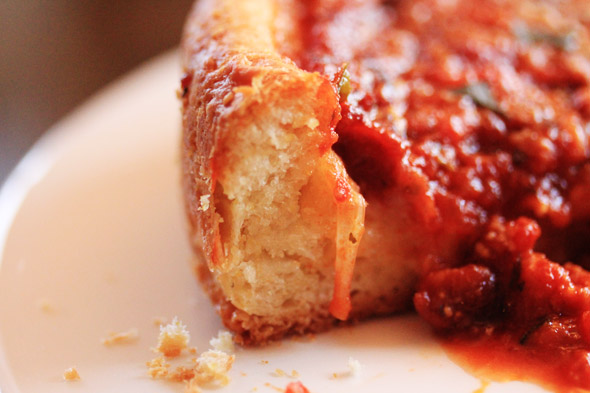
that crust is seriously perfect. Oh my God, this was so good…
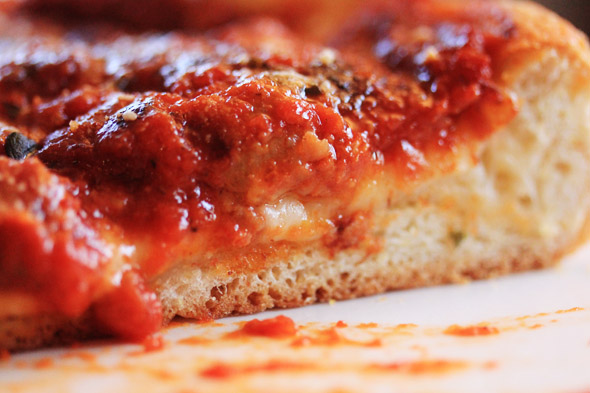
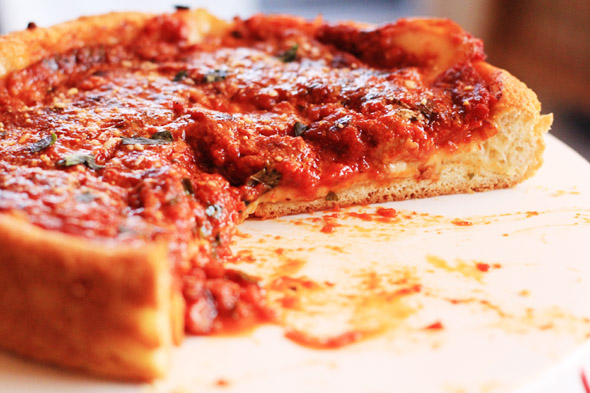
I can’t even describe how delicious this truly was. Phenomenal, and totally homemade. Anybody can do this, you don’t have to be a professional (hell, I definitely am not!).
Make this pizza, you guys…I’m serious…
Print
Chicago-Style Deep-Dish Pizza
- Total Time: 4 hours
- Yield: 2 9-inch pizzas
Description
adapted from Cook’s Illustrated
Ingredients
For the dough:
- 3 1/4 cups (16 1/4 oz.) all-purpose flour
- 1/2 cup (2 3/4 oz.) yellow cornmeal
- 1 1/2 tsp table salt
- 2 tsp sugar
- 2 1/4 tsp instant or rapid-rise yeast
- 1 1/4 cups water (10 oz.), room temperature
- 3 tbsp unsalted butter , melted, plus 4 tablespoons, softened
- 1 tsp plus 4 tablespoons olive oil
Sauce
- 2 tbsp unsalted butter
- 1/4 cup grated onion , from 1 medium onion (see note below)
- 1/4 tsp dried oregano
- Table salt
- 3 garlic cloves, minced or pressed through garlic press (about 2 teaspoons)
- 1 (28-oz) can crushed tomatoes
- 1/4 tsp sugar
- 2 tbsp coarsely chopped fresh basil leaves
- 1 tbsp extra-virgin olive oil
- Ground black pepper
Toppings:
- 1 pound whole-milk or part-skim mozzarella cheese, shredded (about 4 cups) (see note below)
- 1/2 ounce grated Parmesan cheese (about 1/4 cup)
- Hot or mild Italian sausage, casings removed (optional)
Instructions
FOR THE DOUGH:
- In the bowl of a stand mixer, mix the flour, cornmeal, salt, sugar and yeast together on low until incorporated — about 1 minute. Use the dough hook attachment. Add the water and melted butter and mix on low speed until fully combined, about 1-2 minutes, scraping the sides and bottom of the bowl occasionally. Increase the speed to medium and knead until the dough is glossy and smooth and pulls away from the sides of the bowl, about 5 minutes. Keep in mind the dough will only pull away from the sides while the mixer is on, and will fall back to the sides when the mixer is off.
- Coat a large bowl with 1 teaspoon of olive oil, using your fingers. Rub any excess oil from fingers onto the blade of a rubber spatula and transfer the dough to a bowl, turning once to oil the top. Cover tightly with plastic wrap and let rise at room temperature until it’s nearly doubled in size, about 45-75 minutes.
FOR THE SAUCE:
- Heat butter in a medium saucepan over medium heat until melted. Then add the onion, oregano, crushed red pepper and 1/2 teaspoon of salt, cooking and stirring occasionally until liquid has evaporated and onion is golden brown — about 5 minutes. Add the garlic and cook until fragrant — about 30 seconds. Stir in the tomatoes and sugar, increase the heat to high and bring to a simmer. Lower the heat to medium-low and continue simmering until the sauce has reduced to 2 1/2 cups, about 35-30 minutes. Remove the sauce from the stove and stir in basil and oil. Season with salt and pepper, taste and adjust as needed.
TO LAMINATE THE DOUGH:
- Heat your oven to 425 degrees, and put the oven rack on the lowest position. With a rubber spatula, turn the dough out onto a dry work surface and roll it into a 15 by 12-inch rectangle. Using an offset spatula, spread the softened butter over the dough but leave a 1/2-inch border along the edges. Starting at either short end, roll the dough into a tight cylinder (like you would cinnamon rolls). With seam side down, flatten the cylinder into a 18 by 4-inch rectangle. Cut the rectangle in half, crosswise. Take one half and fold into thirds (like a business letter), pinching the seams together to form a ball. Repeat with the other half. Place both dough balls into an oiled bowl and cover tightly with plastic wrap. Let the dough balls rise in the refrigerator until doubled in size, about 45-60 minutes.
- Oil two 9-inch round cake pans with about 2 tablespoons of olive oil each. Place 1 dough ball on a dry work surface and roll out into a 13-inch disk, about 1/4-inch thick. Transfer dough to the pan by rolling it loosely around the rolling pin and unrolling it into the pan. Press the dough into the pan lightly, working into the corners and up the sides by 1-inch. If the dough is tough to work with, let it relax about 5 to 10 minutes before trying again. Repeat with the other dough half.
- Sprinkle 2 cups of mozzarella over the surface of the dough for each pizza. If using sausage or any topping, scatter it evenly on top of the cheese. Spread about 1 1/4 cups of tomato sauce over the cheese and toppings, then sprinkle 2 tablespoons of parmesan over the sauce. Bake until the crust is golden brown, about 25-35 minutes. Remove the pizza from the oven to rest for about 15 minutes.
- Slice, serve and enjoy!
Notes
Note: Place a damp kitchen towel under the mixer and watch it at all times during kneading to prevent it from wobbling off the counter. If you don’t have a stand-mixer, you can do this by hand. Handle the dough with slightly oiled hands, or it might stick. Avoid pre-shredded cheese, it doesn’t melt well. Grate the onion on the large holes of a box grater.
- Prep Time: 3 hours
- Cook Time: 1 hour


[…] deep dish pizza is based mostly on this one from Carnal Dish with very few minor (deep dish pizza acceptable) […]
Yes!!! I used to make this recipe all the time, but then I lost the recipe and the information to your site. I kept searching and searching and had no luck! Finally, I set my google search settings to 2010-2013 and bingo! I’m so happy I found this again.
★★★★★
[…] Recipe adapted from King Arthur Flour and Carnal Dish […]
I haven’t had an opportunity to experience Chicago deep dish either so I don’t know how close this is to the “real” thing but it is de-li-cious! I’ve made this a couple times so far and it’s sooo delicious! The crust is perfect! Thank you so much for this recipe! Your site is one of my go to recipe sites! My taste buds trust you!
★★★★★
that makes me so happy <3
I used your recipe a couple years back and it was great. Very informative. I have the grandson coming over tomorrow and he wants to make deep dish pizza. Glad I could still find your page. I appreciate your effort.
This recipe is amazing. For the folks who are intimidated by the laminating: it’s not that tough, and it’s totally worth it! Can’t wait to have it for dinner tonight… again! Love your writing style and your recipes, full of great tips and plenty of laughs. Cheers!
RESHA!
At first I didn’t want to trust your crust but boy was I wrong! GEEESH! FYE! Thanks for sharing!!!
CAN I MAKE THIS PIZZA WITH FRESH YEAST?
This is about the 5th time I’ve come back to this recipe. It’s the only deep dish recipe that comes out delish every time. My husband and I lived in Chicago for several years and we miss deep dish more than anything else. This recipe brings us back to that heavenly gooey, rich tomatoey, crispy crusty, delectable deep-dish taste every time. MMmmmmmMMM
Fabulous recipe! Thank you so much Resha 🙂
This has become my family’s favorite dinner. The crust is the key and this recipe is great. It’s the only one I use. Kudos, my friend, and God bless!
I have made this pizza several times and everyone loves it. Only complaint is the bottom crust comes out very tough and hard to cut. I am using dark grey non-stick pans. Any suggestions?
Can I ask the brand of pans you’re using? Because I use dark nonstick pans or cast iron and haven’t had this problem at all. Which rack on the oven are you baking the pizza?
I’m using Chicago Metallic pans on the bottom rack
I’m quite late to the party, but I just wanted to thank you for this fantastic recipe. I’m an American living in Sweden, and deep dish pizza is something that you simply can’t get here! I’ve made this at least 4-5 times in the year since discovering it, and it always works a treat, despite my fairly weak cooking skills. 😉
This is my go to Chicago style recipe. I share it constantly and make it a few times a month. Mainly the dough recipe. Great job.
OMFG…this pizza is the shit, best deep dish I have ever had and recipe was easy with your kickass directions and step by step pictures. ..I male one and freeze one for late works out great….Thank you!
Hi! Thanks for sharing this awesome recipe. I have been trying to perfect my deep dish for several years and this looks like the recipe I’ve been looking for. My question is, I followed everything (I’m not a beginner cook either), and my crust tasted great but just wasn’t crispy enough. It was on the softer side although the color was nicely browned and it was fully cooked. It was missing the crunch that Uno pizza has, and the pizza in your pictures definitely looks crispy and crunchy. Do you think there’s something I did wrong to cause the crust to go soft? Thanks in advance 🙂
what kind of baking dish did you use?
Thanks for the recipe! Can this pizza be cooked half way and then saved to be completed the following day? I want to make this for some friends, but I won’t have time to assemble it (even with the dough and sauce pre-made) and cook it after work. Do you have suggestions? Thank you!
I wouldn’t recommend baking it half-way thru. If anything, just assemble it and bake it at their house.
I have made this more times then I can count since finding this recipe. Thank you so much this is the best:) And I feel easy with the awesome directions.
this makes me happy! enjoy 🙂
OMG! Pizza is my absolute favorite food. I consider myself an expert….Lol
This recipe! Girl stop! I’ve gone from NY style to Chicago deep dish as my love! You really did that! You have my vote for best pizza ever
That was amazing! I thought we were going to have friends here for dinner but they backed out. Now what to do with the second pizza? Can I freeze it as is or do I have to bake it first or half bake it? Any suggestions would be great!
Thanks!
is the second pizza already made?
I just made it at about 6000 feet in Idaho and I didn’t change a thing!
thanks for letting us know! that’s a frequently asked question
Hi,
This is fantastic, I have made this several times and mixes the dough by hand. Just make sure to mix it properly for several minutes. Needs to be worked properly….!
Thanks to the poster.
Awesome recipe, turned out exactly like the pictures, I also added pepperoni, I used a springform pan on one pizza and was super easy to remove it from the pan. Also baked one halfway, let it cool and froze it for later, to reheat just thaw in fridge and bake at 400 degrees until done.
I know this is a billion years later but I encountered the same problem. I would use 1-1.5 teaspoons of the pepper flakes. When making this I just went back to her pictures and saw how much she added. It provided the perfect amount of heat.
Great Recipe, thanks a bunch for posting it!!
Came out fantastic!!
I love this recipe. The first time I made it, the crust was nice and crispy! I used my cake pan just as suggested. Since then when I make the pizza, the crust is not crispy – and the pizza seems to be wet (juice collects on top and then makes the dough wet) I am not sure why, unless it is from the cheese because I only had shredded mozzarella to use. Your thoughts please.
I also used beer in place of the water the very first time and it was amazing. Thank you for the pic’s and the great instructions.
On the instructions it said crushed red pepper and I didn’t see any on the ingredient list. How much do you add?
Thank you
Mike
Hi there! What, if anything, do I need to change for high altitude? I live in CO
Resha Resha Resha, I have to say your name 3x’s. Girl OMGEEEEEEE, this was the bomb!!! Awesome & delicious, I was a little intimidated @ first, but I followed your instructions to the T and all came out GREAT!!! I have tried several of your recipes and all have been perfect. I will be making your Vanilla Ice Cream next week in my new Cuisinart ice cream maker. You are beautiful & talented, looking forward to many more recipes. Blessings to you Girl.
Looks awesome. I’m going to make it tonight for my friends! Probably I will make a stuffed pepperoni pizza instead of two!!!!
Thanks for the recipe! Cheers from Greece 🙂
The directions seem like two ways? Laminate the dough in the oven? Or just laminate it on a table?
Thank you
Mike
Hi Mike, you laminate the dough on the counter/table. Let me know if you have additional questions!
Thank you! Also can I freeze or refrigerate the dough so I don’t have to do everything one day and the sauce too?
Thank you
Mike
can regular Active Dry Yeast be used or must it be rapid or instant rise?
Thanks much.
if you want to use Active Dry you’d have to either proof it first in warmer water (110 degrees), or possibly endure a longer rise time if you simply sub it for instant/rapid. i haven’t tried it with anything other than instant or rapid-rise so I honestly can’t tell you what the results would be. I don’t want to guarantee you it’d work the same, it may but it may not. All in all, I’m pretty sure it will work out just fine. Let me know if it ends up working out for you, I’m curious to know..
I redid it with the rapid rise. We loved it! The other dough did rise but maybe not as well. It is in the refrigerator for the second rising so will let you know the outcome in a day or two. Thanks
So…..it’s in the oven and I WILL be patient and wait 15 minutes to cut it after it comes out of the oven.
HAHA! Enjoy hun 🙂
Help! I’m having a pizza assembly party tomorrow. Each couple will assemble a deep dish pizza. I want to make the dough today. What is the best way to make the dough and hold it over 24+ hours until we assemble the pizzas tomorrow. I do not have 8 pans. Because the last rise is a cold rise, if I put it in the fridge overnight, won’t the dough be ruined? Or can I freeze it after the last cold rise? If I freeze it when do I take it out of the freezer? And do I put it in the fridge to thaw before putting it in the pans? Help!
Hi Janene,
You can absolutely make the dough in advance. On the very last cold rise.. just keep the dough balls in the fridge, covered with a layer of olive oil so they don’t develop a skin, and the bowl wrapped with plastic wrap. I have a photo somewhere in this post of my two dough balls in a bowl (I wouldn’t overcrowd the bowl). At that stage is when you’d just keep them in the fridge. They will be just fine if you need to store them overnight. Keep them cold until you’re ready to use them, but give them a few minutes to rest at room temperature before rolling out. They need a little time to relax so you can work with it without any problems. No need to freeze.
Thank you so much for this recipe! I have only found one restaurant that makes true Chicago style pizza in the area & your recipe blows them away! I live in St. Louis & I love my thin crust but I was introduced to this a few years ago & have been craving it ever since. I am so happy that I found this site. I made mine in an iron skillet & I kneaded the dough myself, no mixer ugh but was fine, just took longer.
that’s awesome to hear!! glad you enjoyed it as much as I did. cast iron sounds like the way to go!
Love this recipe. I have been making my pizza this way since March 2014. Thank you!
awesome! thanks for trying 🙂
Thank you for this very very Nice recipe, i love so much Chicago Deep Dish pizza with my wife but I live in French, And I’m sorry I don’t understand something (I’m French so i don’t speak very well English), my question is : the two dough balls are used for the same pizza or for two pizzas?
Thank you
You use ONE dough ball per pizza. You can make two pizzas at once or refrigerate the other dough ball and make it the next day.
My sauce wasn’t as red as the one in the pic
Living in the UK decent Chicago style pizza is super rare – we had deep pizza pie in Giordano’s in Florida in the summer and it was divine – I NEVER COMMENT ON ANYTHING, but, I am making this AMAZING pizza for the 2nd time in 2 weeks!!! Cornmeal is almost impossible to buy here so I substituted it with polenta (for any UK readers) and it was perfect – Thankyou soooooo much for this recipe, a little bit of the USA in the UK!!!
Should like to add….. I had a little dough left over and it made the most perfect “crescent rolls” which we are also unable to buy in the UK – I’ll be rolling out the breakfast casserole!!!!
Fantastic recipe! Made this tonight and will definitely do so again in the future, thanks for sharing. I used a springform pan – it has been sitting in a box for years, now it will see the light again. Yum.
Has anyone tried to make any part of this ahead of time? Can the crust be partially baked and finished off later? Or could the whole pizza be frozen assembled and baked later?? Any info appreciated! Thanks!!
do you recommend pre-baking the base/crust for 10 mins?
I’ve never made deep dish before, but I made this recipe tonight and it came out delicious. I used sausage and green peppers for my “toppings”, and instead of making two pies I used the whole batch of dough and sauce in a 9″ springform pan to make one super-deep-dish pie. It must have come out about three inches tall and one slice was more than enough to fill me up.
I stumbled upon your site and recipe when looking for a good crust recipe for Chicago style. Thank you for the step-by-step photos! They were so helpful in the lamination step. The pie just went into the oven – I made a “traditional” spinach and mushroom – and I cannot wait for it to come out and taste the crust!
I am absolutely not a foodie or cook, but this really made it easy. Maybe I didn’t pay enough attention in the beginning (I was so excited by the “after” photos) but I didn’t realize this made enough for two pizzas. It was a happy surprise!!
Thank you!
Hi, I tried this recipe and did all per the instructions, my crust did not rise or looked at all like that. It was somewhat pasty rather than a bread or flaky crust.
My Pan is a regular cake pan, do I need to use a non stick one?
One more thing, I live in the beach (Sea Level) do I have to change anything in the recipe to compensate?
Sauce was excellent by the way, just the crust did not work for me, oh one more thing, I mixed by hand since I don’t have a large mixer, could this also be a factor? any help would be great, I love chicago style pizza and would like to have a nice recipe to always use
Hi Jorge,
I think that because you didn’t have a mixer to help develop the necessary gluten for this recipe, it didn’t work out for you. I know mixers can be expensive but you only need the absolute cheapest model if possible. It takes all the muscle out for you and leaves you with a great crust that would be hard to get by hand. Humidity can play a small factor as far as how much flour you should use — sometimes you’d have to use less or more (by about 1/4 cup most times), but not having a mixer sounds like the major culprit. If you have pics of your dough you can send them to me so I can see what might have gone wrong for you.
I used the “dough” setting on a bread machine. Add the liquid, then add the dry ingredients, and let it spin. Once it forms into a dough ball, I let the machine work the dough for a few minutes. Then I took the dough ball out to rise and followed the regular instructions at that point. The result: light, flaky, buttery crust.
thanks for posting this. i’m sure it’ll help someone!
Thanks for the reply
I will try with a mixer, I’m sure I can borrow one at first and see how the dough comes out and post the pics just in case. 😉
Hiyas! I love love LOVE chicago deep dish pizza and plan on making it tonight, but wanted to find a new dough recipe, or at least to see if anything out here on the internet looked interesting. I’m liking your recipe and will try it out. =)
There just one little thing I wanted to mention…not a biggie, just an FYI sorta thing. You know how you loved that chain restaurant deep dish pie as a kid? Welp, don’t feel too horrid about it, since that chain is responsible for inventing the flaky buttery crust you’ve come to love.
No one is quite sure whether it was the owner who came up with the dough recipe or his head chef, but no matter which one thought of it, Pizzeria Uno is the place that gave us chicago deep dish pies.
I’ve always used semolina flour rather than cornmeal in my dough, so I’ll probably substitute it in your recipe tonight, but I like the idea of laminating the dough…sounds flaky and yummy!
I never, I mean NEVER comment on sites. But, OMG!!! This pizza was so good that I just had to let you know. I’m so excited about stumbling onto your site & can’t wait to make some of your other recipes as well. Bacon & brown sugar pancakes on deck for tomorrow morning. Thanks so much!
How the heck did you get that out of the cake pan??
LOL I promise it comes right out. I used a Chicago Metallic Non-stick pan, and with the added oil it practically slides right out 🙂
Great recipe. I made it yesterday on National Deep Dish Pizza Day and the crust and pizza was fantastic. There was far more dough than sauce. I made three 9″ pies and had enough dough for at least one more pie (which we didn’t need) but just enough sauce.
Oh my god !!! Made the deep dish pizza soooo damm good !!!!!!!!!!!!!!!! Thank you … Will try more of your recipes .. Keep up the great job.
Excellent step by step instructions. Thank you for posting, especially the dough making steps.
I found your blog thanks to Pinterest. Made your recipe today & it turned out perfect! I’ve been to Chicago either, but I like to think I did the city proud anyway. I’m including links to my own photos, if anyone is interested, below. Thanks for the amazing recipe. My boyfriend actually said “Babe, I don’t care what we ever go through today, I will never leave… As long as you’re cooking this pizza.” Haha!
Prep/Baking process:
http://i.imgur.com/JwiUog4.png
Final Majestic Product:
http://i.imgur.com/dcDXZLr.png
i just drooled! that looks AMAZING!!
This is amazing. I’m from Chicago, my favorite deep dish pizza is Lou Malnaties, arguably the father of Chicago deep dish pizza. I must say, YOU NAILED IT!!!!
Your crust is spot on. I made it with spinach and pepperoni and it was terrific.
I scrolled through all these comments just to see if this recipe measured up to Lou’s. I just moved to Texas and miss the Lou pizza. Going to try this recipe this weekend! My family will be so surprised!!
YAY!! I’m so glad you love it as much as I do. it’s sooooo good!
Try baking this in a cast iron skillet. Oh my goodness good!
that sounds heavenly!!
gawd, again reading delicious recipies with pictures, when my tummy is rumbling and fridge empty and a little blazed.. curse me!! i must say it does look absolutely yummy, my friend from chicago told me about it, i didn’t even kno about it, and now i must try it out 😉 thanks for the awesome instructions, you rawk 😉
Really good crust! Thank you, and I will be using this from now on!
I can’t wait to try this. I don’t have any cornmeal though should I just use more AP flour?
Honestly, if I were you I’d get the cornmeal, it’s pretty crucial to the recipe for the texture. You can use the cheap Quaker Oat kind if that’s all you can find.
I so enjoyed reading your comments on every step of the recipe. Thanks for all the pictures, such a big help when making it yourself
my pleasure <3
Recently found this amazing recipe. I’m living in Denmark, and its hard to find a decent Deep pan pizza at a restaurant. So i tried this recipe a few weeks back, and OMG it was fantastic, very suitable for our family-friday-pizza-dinner.
Thx
Peter
Denmark, nice!! enjoy Peter 🙂
I tried this recipe on Monday (2/24/2014) and followed your instructions carefully since I’m a novice in the kitchen. I served the pizza to my wife, my daughter, and my soon-to-be son-in-law who is a Chicago-Style Deep-Dish Pizza fanatic (who is from Chicago)! He raved that it was better than MOST Chicago-Style Pizzas he’s ever eaten, even IN Chicago! He couldn’t believe how good it was! I have a feeling I’ll be making deep-dish pizza (using this recipe, of course) for many, many years! Thank you, thank you, thank you!
I,m from Chicago and my i say, you are spot on. What a fantastic crust! I hope you don’t mind but I used all the dough in a 14 inch pan. Thank you thank you. K. Ryan
I’m from Australia so we don’t have anything like that but I’ve always wanted to try deep dish pizza, can’t wait to make this!
I made this last night and it was DELICIOUS! I did not follow the directions exactly….I took a few short cuts…..I used my bread maker to mix the dough and I melted all of the butter and included it in the dough, instead of smearing some of the butter on the dough and rolling it up. I also simply took the dough (after it rose for 1-1/2 hours, and hand flattened it into each pan. It was wonderful!…and easy to make with the shortcuts. 🙂
I made this today with a bit of trepidation (working with dough is tricky!) but it turned out great!!! Loved the easy to follow directions! Thanks for posting this!!!
you never said what temperature to bake it.
The directions say heat your oven to 425 degrees.
I’ve made this recipe twice in the past few weeks. IT. IS. AWESOME… I’m Italian so making this is so relaxing and comforting to me, it feels like coming home! I could not be happier that I have a simple but delicious sauce recipe to use from now on. Also, my husband is a deep dish pizza fanatic and he says he loves you. Your blog is really entertaining and it’s an all around great read! I’ll be back!! Thanks for the food.
that makes me smile so much, I’m so happy you enjoy the recipes <3
Awesome recipe. Made it tonight. Exceptional results. Very tasty. For those of you that are amateurs, this is very EASY and the results are fabulous.
Thank you for posting, Resha. 🙂
you’re more than welcome!! <3
Thank You! This was the best pizza ever!
My son lives in Chicago and we visit often and can say that this pizza was as good as the ones I have eaten at Uno’s.
The pictures were such a help and step by step direction made this difficult process a snap!!
Yep, this was great, thanks for sharing! I’m never going to buy pizza from a shop again. 🙂
Going to have to remember to bump the temp down to 400 when using cast iron skillets. Great taste, but I got the crust a little too dark.
Seems like the crust is missing something. I’ll try to figure out what it needs.
We have 3 people in our house with different tastes in pizza, So i multiplied the recipe by 1.5 to use 8″, 10″, and 12″ iron skillets. Amount was perfect.
fantastic
I have a 14″ deep dish pan would you recommend the whole ball? Two growing boys 9″ are personal pans for them. LoL
Can’t wait to try.
Hmmm, you may not need the entire ball when you take into account how much the dough will stretch out before you pack it into the pan, but i’m not sure how deep your pan is, so you may need the whole ball. try it, and cut any excess if it hangs off too much, or if its just too much dough packed into the pan.
Hi there! I’m from Singapore – yeah half way round the world!
I’m making a modified version of this for dinner tonight.
1. Deep Dish Tom Yum Chicken Pizza – ultra Asian I know!
2. Deep Dish Artichoke Pizza – with a white chickpea cheese sauce
Am sure it’ll turn out great! Thanks for the recipe! 🙂
Hi Joseph! That sounds so good, please let me know how they turn out <3
ps. you're in Singapore, i'm so jealous lol. i've always wanted to visit.
I made this yesterday and have to say its the best pizza I have ever tasted! I cant believe you would share something as good as this! You could easily open a succesful pizzeria in some countries with this
Thanks so much for this recipe! We loved Chicago style “pizza pies” in the US but you can’t get them anywhere here in Australia (near us anyway).. Your pictures looked just like we remembered, so we gave it a go last night… AMAZING!! Have shared the recipe with a few friends already 🙂
I’m so happy you enjoyed the recipe! Share with everyone 🙂
Tried this today for a New Years party made 4 deep dish pizzas. The crust was perfect. It was bready enough to accompany the toppings and marinara but still buttery and crisp. I added a little more garlic to the sauce and topped with more mozzarella than suggested. I’d recommend this to others. Best wishes for 2014!
Thanks Kevin! I’m so happy you enjoyed the recipe, it’s one of my favorites. Enjoy your year!
I’m from Chicago and this recipe is legit!!! I made a gluten-free version and it was SO DELICIOUS!!! Ahh!!! Thank you for posting this!!!!!
Wow that’s great to know you can make it gluten-free, and you’re so welcome! I’m so happy you love it <3
Resha, last weekend we needed a break from Turkey, so I made your most outstanding recipe. Quite frankly, I was a little intimidated, but the recipe was easier to follow than I thought, and in a few hours, I had THE best homemade pizza of my life! I have the other dough ball in my fridge, just waiting for the right time (tomorrow!) Thank you for an amazing experience, this is a terrific recipe! (PS–I am from the Chicago Area, so I know good Chicago pizza when I taste it—and this is great!)
awww you’re so welcome, i’m so happy to hear you enjoyed it as much as i did!! also good to know an official Chicago native approves!
I also made an adaptation of this Cooks Illustrated recipe. I made a vegetarian version of the recipe. It’s loaded with veggies which help offset the richness of the crust and the cheese.
You can’t help but love the original cheese or sausage though. 🙂 This looks amazing and I love your step by step photos. Thanks for posting!
that’s awesome to hear!! a veggie version sounds heavenly 🙂
Love this recipe mines in the oven now. We live in uk but we are massive American food fans having never been to America its great that u post stuff for us to try out. Thanks
Great recipe!! I adapted the dough to make it gluten free (I’m celiac) and it turned out amazing!! It was the best gluten free pizza I’ve ever had.
What a great post, thanks for the effort, lot of pics, thanks
Jeb Banner
I liked the recipe with the exception of the 3 cloves of garlic! Way to much, my wife is Italian and she almost left me, LOL. Maybe use just 1 clove. Other than that I really enjoyed making it.
LOL, your garlic cloves must have been pretty big. The ones I used were very tiny 🙂
Attempted this. It came out delicious! New favorite pizza for sure.
How long before baking can you store the final kneaded dought (with butter included)?
24 hours in the fridge, covered with plastic. i’ve made this dough numerous times and used the second half the next day with zero problems.
Can I use a hand mixer to mix the dough
i wouldn’t. i don’t think they’re strong enough.
This is a great dough recipe! I made one pizza and froze the other dough ball. About two weeks later I used the frozen dough ball. My 9inch pan mysteriously disappeared after I made the first pizza so I baked it in an 8inch one – It turned out delicious though slightly deformed looking. One of the best pizza crusts I have ever tasted! Thank you!
haha, good to know 😉
Hi there :). This recipe looks soooooooooooo amazing. If I wanted to make just one pizza, would I just halve all the ingredients?
OMG, this is mouthwatering!!!! Thanks for sharing the step by step directions and pictures…. I’m definitely making this pizza. I just have to get the deep dish pan… THANKS!
Hello! So glad to have stumbled upon your recipe. I hope to make it tomorrow evening for girl’s night but I do not have a mixer. I noticed on your note that you say the dough can be kneaded my hand. Does this work okay?
yeah you can knead it by hand, just use some serious muscle 😉
I.Am.A.FAN! Everything about this pizza is sheer amazingness. Completely jizz-worthy.
LOL
[…] we’ve discussed my fear of yeast!) But hey, I baked sauce too! (excellent recipe taken from Carnal Dish) be warned…this splatters (hence the improvised paper towel covering). I wasn't going to […]
This pizza is really, really good. Definitely adding this to the recipe box!
How do you go store it & reheat it?
store leftovers in the fridge, reheat slices in the oven — set between 350 and 400 degrees until heated thru
Ohhhh my gosh!!! I made this last night it was a big big hit!!! So yummy and cheesy and the crust was very good.
*high five*
what’s the best way to remove the pizza from the pan?
sn: thanks for this! i have missed giordanos and gino’s east so bad since moving to the south.
I’d bake the whole pie with a piece of baking paper underneath.
I’d lift the whole pie using the baking paper
I used a springform pan. Just pops right out! My boyfriend is from Chicago and he LOVED it. Awesome recipe!!
If you let it rest for a good 20 minutes in the pan, it should slide right out. try gently loosening it up by turning it inside of the pan after 20min to make sure it isn’t stuck. then tilt it a little, and use the point of a butterknife to kinda help it out.
thanks! i ordered a cake pan especially for this and i can’t wait to try it!
Man! Pizza was delicious. You right. I might not ever order out again!
LOL 😉 enjoy!!
I decided to make this about 24 hrs ago & I haven’t any had another source of nourishment since then LOL. This is perfect & tastes even better as breakfast this morning. Thank you!
awesome!! glad you enjoyed 🙂
This looks so good. I decided for the new year I am going to start cooking at home and from scratch. I can’t wait to make this as my first meal from your recipe.
you’re going to love it. its sooooo good.
O.M.G.
I cannot believe you made deep dish pizza that looks like it can rival the best in the city (said the pretty Chi-town girl! LoL)
I cannot wait to try this! *EXCITED!*
LOL WOW! well that makes me feel a little better. I haven’t had “real” chicago pie so I prayed I did it a tiny bit of justice at the very least lol. I know one thing, it’s damn good.
Girl, you are a professional. This looks amazing.
HAHA Thank you! I’m no pro though, but I’ll take the compliment 😉 LOL <3
This looks SO DELICIOUS. Is it possible to halve this recipe to make only one pizza?
yup