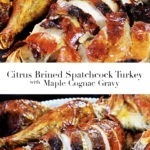
Happy Thanksgiving! I wanted to share my recipe for a deliciously juicy, crispy skinned citrus and herb dry brined roasted turkey. The video tutorial is a couple years old, but still relevant. This wonderful bird is served with a delicious maple cognac gravy, which is totally optional.
WTF is Spatchcocking
Spatchcocking sounds like a dirty word, but all it means is that you’re removing the backbone of the turkey (or chicken) in order to butterfly it so that it lays flat. How do you remove the backbone? You’re gonna need a really sharp chef’s knife or some killer kitchen shears. Or, you can get your butcher to do it for you. The great thing about this technique is that it allows the entire bird to cook evenly. Dark and white meat require different cooking temperatures in order to be eaten safely, and without over or undercooking different parts of the bird. So, by butterflying/spatchcocking, you start with an even playing field to roast your bird.
Learn more about this method from Serious Eats. I used their technique for this particular turkey and it turned out amazing.
Citrus-Brined Spatchcock Roasted Turkey
Why Dry Brine?
Dry brining is a stellar technique that allows you to season the bird without bloating it with excess water from a traditional liquid brine. Most people brine their bird in a huge container of liquid, but it can also result in a wetter bird with less flavor. Dry brining concentrates the flavor of the meat while making it juicier. Drying out the skin helps it crisp up wonderfully. A wet brine can result in a less crispy bird, with blown out flavor if not executed correctly. I’m not saying you can’t have a great turkey with a wet brine, because you definitely can. I’m just saying that dry brining is a better way.
How to store a brining bird
If you have room in your fridge to lay a butterflied bird in there, by all means do this method. If you don’t have room, keep the bird whole and just spatchcock it prior to roasting. You can dry brine for up to 3 days, but if you do this, make sure you cover the skin the first 2 days with plastic wrap to avoid excess moisture loss. You want the skin to be exposed (without plastic wrap) for 24 hours only. Dry brining can be done in as little as 24 hours, but if you do it this way, leave the skin uncovered for that full day before roasting.
450 Degrees??
Yes! We are high-roasting this turkey. All that means is that it’s going to roast at a very high temperature, and because we dried out the skin, you’ll notice the skin is cracker-crisp! Pay attention here, because if your oven runs super hot, you may need to reduce the heat. Check the color after about 30-45 minutes, and proceed accordingly. 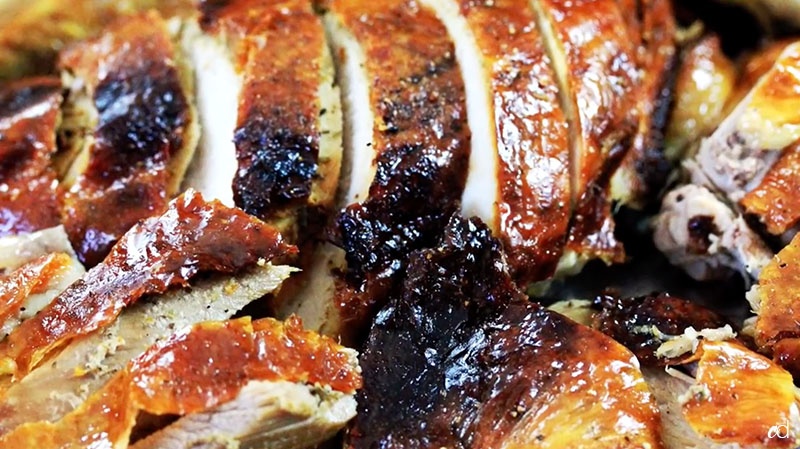
How to Dry Brine and Spatchcock a Turkey | Video
Again, this isn’t really a recipe (although one will be provided). This is all about the technique. Spatchcocking in this particular method works best for a bird no larger than 14 pounds. If your turkey is larger, you may want to find another method because you’ll risk overhang of the bird in the oven. That just means the legs will be exposed and may burn. Anything smaller than 12 pounds, and you’ll basically end up overcooking it. An instant-read thermometer is SO important, so please invest in one as soon as you can.
Here are some other great recipes:
- Million Dollar Chicken
- Herbs de Provence Roasted Chicken
- Roasted Chicken and Parmesan Herb Dumplings

Citrus and Herb Dry-Brined Roasted Turkey
- Total Time: 25 hours 25 minutes
- Yield: 10-12 servings
Description
Method inspired by Serious Eats.
Ingredients
- 1 12-14 pound turkey (SEE NOTE)
- Aromatics: garlic, onion, celery, fresh herbs, sliced citrus
- Olive oil
- 1/4 cup plain kosher salt, plus more if needed (SEE NOTE)
Citrus-Herb Salt Brine
- 1/2 cup kosher salt (SEE NOTE)
- 2 tablespoons herbes de provence
- 1 tbsp lemon zest
- 1 tbsp orange zest
- 1 tablespoon black pepper (optional)
- 1 teaspoon granulated garlic
- 1 teaspoon granulated onion
For the gravy
- Giblets and backbone from turkey, chopped into pieces
- 1 large carrot, chopped into large pieces
- 1–2 stalks celery, chopped into 3-inch pieces
- 1/2 small onion, chopped in half
- 3 tablespoons butter
- 1–2 tablespoons olive oil
- Aromatics: fresh thyme, rosemary, sage, bay leaves.
- 2 1/2 cups chicken stock
- 1/2 cup turkey drippings
- heaping 1/4 cup all purpose flour
- Splash of Maple Cognac (or regular cognac)
Instructions
Warning: you probably won’t need ALL of the salt for the outside of the skin, nor all of the brine mixture for under the skin and on the inside of the bird. The goal here is to salt it evenly, but not have it encrusted in salt. Please use discretion, but at the same time be liberal. If you find you need more, please use more. Turkey is extremely lean and notoriously dry, so it can take some extra salt to ensure its juiciness.
Equipment used: A large sheet pan
Combine all ingredients for the dry brine.
- Rinse your bird thoroughly, pat dry with paper towels.
- Using super sharp kitchen shears, cut out the backbone and save it for the gravy along with the giblets.
- Flatten the breast meat down, using all of your weight, or a heavy cast iron skillet or pot to assist you. You want the bird in one even flat layer so it roasts evenly.
- Separate the skin from the meat of the turkey and massage some of your salt mixture onto the inside of the flattened bird, and under the skin.
- Sprinkle plain kosher salt all over the skin of the turkey. It shouldn’t be encrusted in salt, just a good even layer. Get all in the nooks and crannies. If you’re roasting the bird within the next 24 hours, do not cover it before you refrigerate it. This will allow the skin to dry out and roast up nice and crispy. If you’re cooking the bird in 2-3 days, keep it covered with plastic wrap (loosely) during that time to prevent excess moisture loss. Remove the plastic during the last 12-24 hours though.
- Remove the turkey from the fridge 1 hour before you’re ready to roast it, so that it comes to room temperature.
- Preheat your oven to 450 degrees. Line a baking sheet with foil and scatter some random aromatics (garlic, onion, celery, carrot, fresh herbs, citrus) just to give the turkey a bed to lay on so that the bottom doesn’t burn. Rub the skin with olive oil.
- Place turkey in the oven and roast until an instant-read thermometer in the breast meat registers 150 degrees, and the dark meat registers 165 degrees, about 80-90 minutes. Quick note: Adjust oven temperature if your bird is browning too quickly. Start at 450 degrees, but if after 45 minutes, it’s getting too dark, reduce the heat. Cooking times will vary on the size of your bird, how hot your oven is, etc. Check the temperature after an hour. This is why a thermometer is SO important. A turkey with 150 degree breast meat is perfectly safe to eat if rested properly. Remove the bird once it’s at 145/150 and let it rest. It will continue to “cook” out of the oven, and the internal temperature will rise another 10 degrees or higher, depending on the bird. So resting is SUPER important for safe eats.
- Let the bird rest for one full hour before carving.
For the gravy
- Saute the backbone and neckbone in olive oil until browned, about 7 to 10 minutes.
- Add aromatics and cook an additional 4-6 minutes or until veggies have softened slightly. You can do this in a skillet and then transfer to a saucepan or you can do this in a saucepan from the start. Add enough chicken stock to cover the mixture, add fresh herbs and bay leaves, and bring to a boil. Reduce heat and simmer uncovered for 40-45 min or until visibly reduced. Strain mixture into a measuring cup or bowl along with 1/2 cup of the turkey drippings.
- Melt the butter and oil in a saucepan, and add a heaping 1/4 cup of flour. Whisk for about two minutes to allow flour to cook out.
- SLOWLY add 2 cups of the hot broth mixture, a little at a time, whisking vigorously to avoid lumps.
- Reduce heat to low and allow to simmer and thicken for about 5 minutes. Add a tiny splash more of the cooking liquid if your gravy is too thick. Give it a taste and adjust seasoning.
- Add a splash of Crown Royal Maple Cognac (or any liquor) and cook an additional minute or two.
- Serve with the turkey.
Notes
This spatchcock cooking method will only work on a medium-sized turkey that’s between 12 and 14 pounds. Anything larger, and you will risk overhang, which will result in overcooked/burnt legs.
Use the 1/4 cup of plain kosher salt JUST for the outside skin of the bird, and use the Citrus-herb Salt Bring mixture for the inside of the bird and under the skin. You more than likely won’t use all of the salty brine mixture for the underside and inside of the turkey. Use your best judgement, but keep in mind that turkey’s can take more salt than most proteins.
PLEASE use an instant-read thermometer to avoid overcooking or undercooking your turkey. Grab one now online, or hit your nearest store for one. They are lifesavers.
- Prep Time: 24 hours
- Cook Time: 85 minutes
- Category: poultry
- Method: dry brine, roasting
- Cuisine: American
Keywords: dry brined turkey, spatchcock turkey, thanksgiving

Hey, Chef!
How would you adjust this recipe for turkey legs and wings? I ain’t ready for a whole bird and cutting out backbones!
Thanks, Chef!
P.S. I tell everyone I have a food conversation with about you! And herbs de Provence. And your shrimp and grits. And garlic chicken. And keto cake. And cauliflower Mac and cheese. Girl! I don’t have a favorite anything, but I have a favorite chef (and friend in my head)!