Buttermilk fried chicken is one of those things people always want to know how to make. I get it, it’s seemingly so simple, but it’s also just as easy to screw up. There are several factors that need to be on point in order for your buttermilk fried chicken to be stellar. First, oil temperature. Nobody wants a golden brown stunner that’s bloody and raw inside. Salmonella doesn’t taste good, I’d imagine. If your oil is too hot, it’ll brown before it actually cooks — and yes, this is something I believe everyone experienced this at least once in their lives. You’re not alone, there’s a support group out there somewhere. On the flip, if your oil is too cold, the coating will soak up too much grease and you’ll have soggy, oily chicken. Then there’s the seasoning factor. Nothing worse than battering up your chicken only to find the end result bland or TOO salty (for your liking). I like my chicken enjoyably salty, not “spike my blood pressure” salty. I want to taste it, but not an insane amount of it. Throughout the years, I’ve made really good fried chicken and really bad fried chicken. It’s one of those things you just have to keep trying until you master it.
Measuring while I cook isn’t something I naturally do, unless I plan on sharing a recipe. If I feel like sharing it with you, I’ll write down exactly what I did, and go from there. Give this buttermilk fried chicken recipe a try. There may be an ingredient or two that you don’t have, and that’s fine. Don’t cry about it, don’t get discouraged, just swap it for something else or leave it out. Recipes like this are flexible as far as individual tastes go, so what I like, you may not and vice versa. I’m always gonna encourage you to venture out on your own and develop flavors that make YOU happy. But this is damn good chicken. Probably my favorite fried chicken to date, and I’ve made some bomb chicken recently.
Buttermilk Fried Chicken Tips
- First, don’t feel pressured to marinate your chicken for a full 24 hours. Sure, it won’t hurt at all, but in most cases it’s not necessary — especially if your craving for it forces you to have it the same day you dunked it in that tangy buttermilk. You can do this in as little as two hours for crazy delicious results. If you’re going to do the full 24 hours, don’t pre-salt the chicken as much. Just enough to season the buttermilk.
- Chicken cooks more evenly when it’s room temperature. So before you plan on frying, take it out of your fridge and let it sit at room temperature for at LEAST 30-minutes, and no longer than two-hours. Your chicken should also be covered, either in a bowl with plastic wrap or inside of an air-tight ziploc bag. This will help keep outside evils from getting into your yummy yardbird and causing problems.
- Our grandmothers didn’t use thermometers, but times have changed. You don’t want to risk frying up some beautiful salmonella, so please get a cheap thermometer so you can keep track of your oil temperature and the internal temperature of the chicken.
- Fry your chicken in a vessel that’s designed to conduct heat evenly and stay hot. You could use an electric fryer, but if you don’t have one, use cast iron. Doesn’t matter if it’s enameled or non-enameled, cast iron is amazing for frying chicken — ask your grandma.
- Now is not the time to be shy with the salt. Everyone loves that perfectly salty, crunchy bite of fried chicken. It’s arguably the reason why it’s so good in the first place. Ever had bland fried chicken? It’s an abomination, and a waste. Again, you’re not looking for “All I taste is salt”-salty, but “Ahh, this is delicious”-salty. The type of salt you use matters. I prefer a flaky kosher salt in my dredge, it adheres better, has a larger surface-area, and doesn’t sink to the bottom of your flour mixture as you’re mixing. That means the salt is actually gonna be on the bird in the end. Even though you salt the dredge, you want to also sprinkle just a liiiiittle bit on the finished product once it comes out of the fryer.
Watch The IG Story Clip
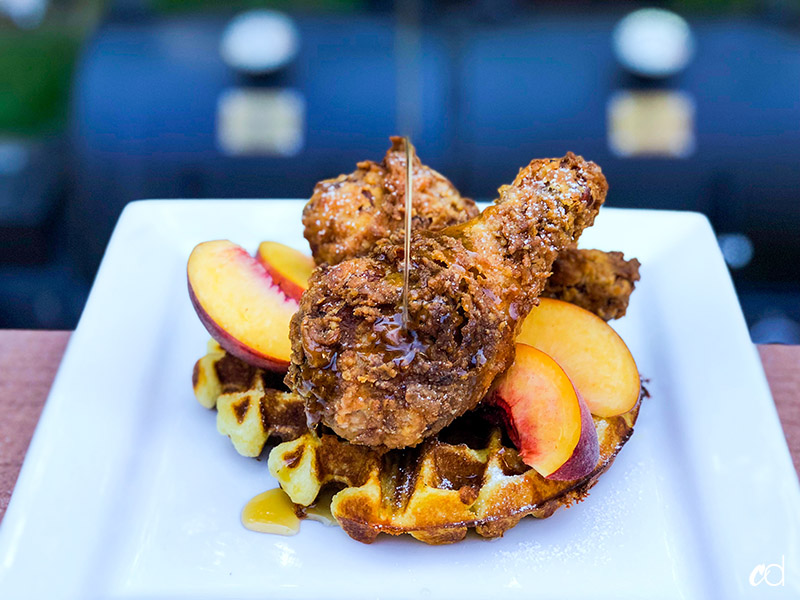
Also, follow me on Instagram (I cook on my InstaStories often).In my humble opinion, a well-seasoned piece of fried chicken pairs best with a savory waffle. As I get a little older, I like things less sugary-sweet. Sure, you could pair your chicken with a sweet waffle, but I think a savory one works far better.
I’m using the King Arthur Flour Classic Buttermilk Waffle recipe as a base. I’ve been using it for years, and it’s really a great recipe if you don’t have time to make a yeasted waffle. What I love about the KAF recipe, is that it’s fully customizable. You can make it sweet, or savory. Just leave the sugar out, and add in your own preferred ingredients.
Print
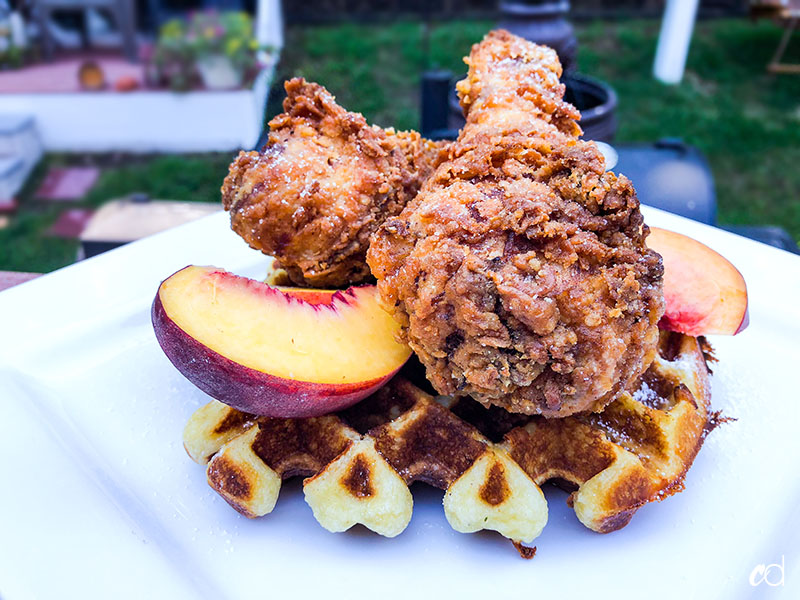
Buttermilk Fried Chicken with Thyme Cheddar Waffles
- Total Time: 3 hours
- Yield: up to 8 servings
Description
Waffle recipe adapted from KAF
Ingredients
For the chicken:
- 4 cups self-rising flour
- 1/3 cup cornstarch
- 1 teaspoon baking powder
- 2 tablespoons flaky kosher salt, plus more (Diamond Crystal or David’s)
- 1 tablespoon onion powder
- 1 tablespoon garlic powder
- 1 teaspoon chili powder (I used Hatch Chile powder)
- 1/2 teaspoon cayenne pepper
- 1/2 tablespoon smoked paprika
- 1/2 tablespoon black pepper
- 2 to 4 cups whole buttermilk (depends on how much chicken, SEE NOTE BELOW)
- Chicken for frying
- 1 quart vegetable oil for frying
For the waffles
- 2 large eggs
- 1 3/4 cups whole buttermilk
- 8 tablespoons butter, melted and cooled to room temperature
- 1 teaspoon vanilla extract
- 1 3/4 cups all-purpose flour
- 2 teaspoons baking powder
- 1 teaspoon baking soda
- 1 teaspoon salt
- 1 cup shredded cheddar
- 1 tablespoon fresh thyme
- Maple syrup for serving
Instructions
For the chicken
- Toss your chicken in kosher salt, enough to cover it. Place chicken in ziploc bags or a large enough bowl to fit it, and pour in your buttermilk. Don’t add a ton of buttermilk here, just enough to coat it and allow it to penetrate the meat. Marinate the chicken for at least 2 hours and up to 4.
- When ready to fry, make sure your chicken/buttermilk mixture comes to room temperature, at least 30. Combine the flour, cornstarch, baking powder and seasonings with a whisk, set aside. Heat your oil to 350 degrees. Meanwhile, gently and thoroughly coat the chicken in the flour mixture. Shake off the excess, and place each piece on a clean cutting board, or baking sheet. Allow the coating to adhere for about 15 minutes. Re-dredge the chicken one more time, and allow to adhere an additional 10 minutes. Once your oil has reached 350 degrees, gently place up to 6 pieces of chicken in the hot oil. Turn the chicken often to prevent concentrated burn spots, if necessary. This happens because any coating that sinks to the bottom cooks up fast and can burn onto the chicken, especially as you do it in batches. Fry the chicken until it’s a deep golden brown, and registers at least 170 degrees internally for dark meat, and 160 degrees for white meat. You’ll also know when your chicken is about done when the crackling sounds of the oil start to simmer down and lessen. The chicken will also kinda float to the top. Dark meat, particularly thighs and legs are notorious for cooking unevenly because of the way the meat is formed along the bone. If you find that your chicken is golden brown on the outside, and still pink in the middle, pop it into a 400 degree oven and cook until the juices run clear. This will prevent the outside from darkening too fast, which is what will happen if you continue to fry it.
- When the chicken is done, place it on paper towels or a baking rack to allow excess oil to escape. Immediately sprinkle a very fine dusting of finishing salt over the chicken, not too much, just enough to punch up the flavor.
- Serve with the thyme and cheddar waffles, and enjoy!
For the Waffles
- In a medium-sized mixing bowl, beat together the eggs, buttermilk, melted butter, and vanilla.
- In a separate bowl whisk together the dry ingredients.
- Combine the wet and dry ingredients, stirring just until nearly smooth; a few small lumps may remain.
- Spray your waffle iron with a non-stick cooking spray before preheating it. Cook waffles according to the manufacturer’s directions. For an 8″ round waffle iron, use about 1/3 cup batter; cook for 2 to 3 minutes, until the iron stops steaming.
- Serve immediately with the fried chicken and maple syrup.
- Enjoy
Notes
You don’t need the chicken swimming in a TON of buttermilk, just enough to coat each piece thoroughly. Start with 2-cups, and add more if you have a lot of chicken.
- Prep Time: 2 hours 30 mins
- Cook Time: 30 mins

Don’t know if your blog is still taking comments but I made this yesterday. Husband said it was the best fried chicken he ever had. And I have never fried chicken before. Hats off to you, lady.
How to bring oil temperature down if it seems too hot?
Reduce the heat and let it cool down a bit, or add fresh oil to bring down the temperature.
I love your food and your site! People always go crazy when I make something of yours!